
Jumping into jewellery making can feel kind of intimidating. There’s so much shiny stuff out there and, honestly, who really has time to run around buying every little tool you might need? That’s why jewellery making kits are a game-changer. Everything comes in one box—beads, wire, pliers, clasps—so you can skip the hassle of piecing it all together and actually get started.
One cool fact: Most beginners finish their first bracelet or pair of earrings in under an hour. The real secret is to pick a kit that matches your style. If you like minimalist looks, go for something with simple beads and maybe some cord. More into bold or funky pieces? Choose a kit with chunky stones or lots of color options. Don’t let fancy tools scare you off either. For most starter projects, all you’ll need are some basic pliers and a bit of patience.
Avoid the trap of aiming for perfection. Those first wobbly loops or uneven bracelets? They actually help you learn faster than you think. Embrace the small mistakes—they usually teach you more than a perfectly finished piece ever could. And who knows? That 'imperfection' might become your signature look.
- Why Jewellery Making Kits Are the Best Way to Start
- Essential Tools and Materials That Actually Matter
- Easy Beginner Techniques (Without Fancy Equipment)
- Common Mistakes and Quick Fixes
- Turning Your Hobby Into Gifts or a Side Hustle
Why Jewellery Making Kits Are the Best Way to Start
If you’ve ever stood in a craft store aisle staring at a wall of beads, you already know how easy it is to get overwhelmed. There’s a reason jewellery making kits have become so popular with beginners—they pretty much solve that problem. Everything is picked out for you, the instructions are right there, and you never have to worry about missing a key piece or buying something you don’t need.
One big reason kits work so well: you don’t have to guess what tools or supplies to buy. A good kit usually includes pliers, wires or elastic, clasps, and a range of beads or charms. No extras, no weird leftovers. This takes out the headache and lets you focus on learning instead of shopping.
Here’s a neat comparison to show what you get with a jewellery making kit versus buying everything separate:
| Starter Kit | Buying Individually |
|---|---|
| All-in-one: matches parts for 5-10 projects | Parts might not fit or work together |
| Instructions designed for total beginners | YouTube or random PDFs (can be confusing) |
| Pliers, wires, clasps, beads in one package | Hunt for every item, risk missing one |
| Average cost: $20-$40 for 5 projects | Average cost: $35-$60 (more if you mess up or buy extras) |
Another plus: kits skip the quality-guessing game. Reputable brands usually include tools that actually work—and beads that don’t chip or break apart five minutes later. You can save money too, since kits often cost less than buying items separately, especially once you factor in leftovers you may never use again.
If you’re worried about skill level, don’t be. Kits are designed for people with zero experience. You don’t need to know any technical terms. It’s basically plug-and-play for crafts. And if you mess up a little? Chances are, you’ll have enough extra materials in the kit to fix your mistake or just start fresh. That boosts your confidence and makes the whole process way less scary.
Just getting started is so much easier when you strip away all the guesswork. No need to stress over which tools to pick or which beads go together. Kits just make things straightforward—so you can focus on having fun and maybe even surprise yourself with your first finished piece.
Essential Tools and Materials That Actually Matter
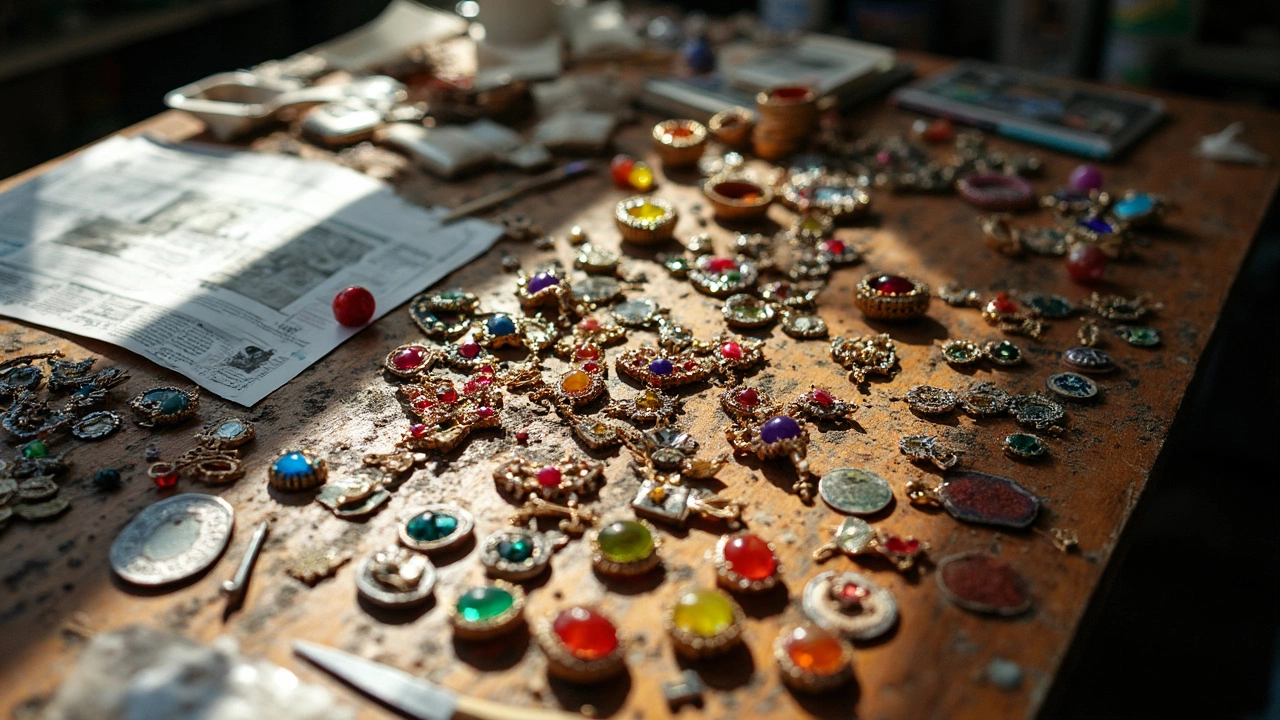
If you’re staring at a wall of bead strands and tools, here’s your shortcut: you actually don’t need one hundred gadgets to get started. When you open most jewellery making kits, you’ll see the same handful of tools again and again—and there’s a reason. These are the only ones almost every beginner actually uses.
First up, you’ll want a pair of round-nose pliers. These are perfect for making loops in wire or headpins, and honestly, no kit is complete without them. Then you need chain-nose pliers. Think of them as your tiny hands for grabbing, opening, and closing jump rings or hooks. Add some wire cutters, and you’re covered for pretty much any basic project. That’s it for tools in 90% of starter sets.
Don’t waste money on a bead board or special crimping tool right away unless you’re planning something super advanced. Basic kits have you covered for necklaces, bracelets, earrings, and even anklets without any of those extras.
Now, materials. The big three are:
- Beads (glass, plastic, gemstone, or metal—pick what feels like you)
- Wire or stretchy cord (make sure you have the right thickness—0.5mm stretchy cord is a solid all-rounder)
- Clasps and jump rings (usually lobster clasps and split rings are standard in most beginner kits)
Pro tip: Check that your starter kit actually tells you what’s inside. There’s nothing worse than sitting down to make a bracelet and realizing you don’t have any clasps in the box. If you wear jewelry daily and want it to last, look for materials labeled as 'nickel-free' or 'hypoallergenic.' Your skin will thank you.
And finally, don’t be scared off by fancy beads or heavy-gauge wire you see online. Simple projects with basic materials give you a chance to figure out what you even like to wear or make. Start basic, and the rest will fall into place.

Easy Beginner Techniques (Without Fancy Equipment)
Jewellery making doesn’t need weird tools or a big budget. Tons of cool stuff comes together with simple moves you can pick up in minutes. If you’ve got basic pliers, a flat surface, and one of those jewellery making kits, you’re set. No silver-smithing torch or crazy gear needed.
Let’s talk about the easiest starter moves:
- Stringing beads: This is probably the first skill everybody learns. You thread beads onto elastic cord or wire—nothing fancy. Tie a couple of secure knots or use a crimp bead to keep them in place.
- Basic wire loops: With wire and round-nose pliers, you can make simple loops for earrings or to connect pieces together. It’s a lot like bending a little paperclip. Keep your hands steady and go slow—the goal is a smooth circle, not perfection.
- Crimping: Those little metal beads called crimps? You smoosh them flat with pliers to lock your string in place. It’s about as technical as closing a sandwich bag, honestly.
- Attaching clasps: Using jump rings and pliers, you can add closures to bracelets and necklaces. Before you think ‘that looks fiddly,’ just know: it’s like opening and closing a keyring.
- Stretch bracelets: If you want quick wins, elastic bracelet kits are awesome. No tools are really needed except maybe scissors to trim the ends.
There’s a good reason pro jeweller Emma Thorpe said:
“Starter techniques are the heart of every project. Don’t worry about fancy moves—the basics let you create jewelry you’ll actually wear.”
Two quick tips: Work near a tray or towel so runaway beads don’t hit the floor. And measure twice, cut once—it saves a ton of frustration, especially with cord or wire.
Master these starter techniques and you’ll be able to handle most beginner projects, from necklaces to charm bracelets. The best part? You’ll spot your progress with every new piece you make.
Common Mistakes and Quick Fixes
If you’re new to jewellery making, you’re going to make mistakes. That’s not just normal—it’s actually a good thing. Most people run into the same handful of problems, so you’re definitely not alone. Here are the most common slip-ups and what you can do to fix them, fast.
- Loose crimps: Ever have your bracelet fall apart right after finishing it? That’s usually because the crimp beads aren’t tight enough. The quick fix: squeeze the crimp harder with your pliers until it’s flat, or double crimp for extra hold.
- Over-twisted wire: When wire gets too curly or snaps, it’s usually because it’s been bent back and forth too much. Cut off the damaged bit and start fresh; try not to twist the wire any more than you need to form a loop.
- Uneven bead spacing: This one drives everyone nuts. Sometimes beads drift apart on a cord or wire, making your necklace look sloppy. Fix it by choosing snugger bead tips or adding small spacer beads to hold things in place.
- Jump rings that won’t close: Jump rings (those little rings that attach charms or clasps) are easy to mangle. If they’re not meeting up right, gently twist them back with pliers from side to side, never pulling them apart front-to-back. This keeps them round and secure.
- Pliers leaving marks: If your pliers are leaving scratches on metal, you’re probably squeezing too tight or using the wrong tool. Use nylon-jaw pliers for softer metals, or wrap your regular ones in masking tape.
A lot of beginners stress over how often they mess up, but here’s a fun stat: jewellery making kits have a 86% satisfaction rate with first-time users, even though two out of three admit to having a funny story about a beading fail.
| Mistake | Quick Fix |
|---|---|
| Loose Crimp | Flatten harder or double crimp |
| Over-twisted Wire | Cut and start again, avoid extra bending |
| Uneven Beads | Add spacers or use snug bead tips |
| Jump Ring Issues | Twist sideways, not apart |
| Pliers Scratching | Use nylon tips or tape |
Save every little piece you mess up on. They’re not just reminders of what not to do—they make great test pieces for trying out new techniques without any pressure.
Turning Your Hobby Into Gifts or a Side Hustle
So you’ve got a few pieces under your belt and you’re feeling proud—now what? Here’s the thing: homemade jewellery has real value as gifts and, yep, even as a way to earn a little extra cash. People genuinely love getting handmade items, especially when they’re personalized. Think of how many times you’ve struggled to find a last-minute birthday present or a unique thank-you gift. A handmade bracelet or custom pair of earrings solves that problem every time.
If you want to go one step further and dip your toes into selling, there’s never been an easier time. Online marketplaces like Etsy, Depop, and even Facebook Marketplace make it super simple to list and sell your items, even if you’ve never run a business before. According to an Etsy report from 2024, over 2 million sellers offered jewellery, making it one of the platform’s hottest categories. And get this—over 40% of jewellery sellers started out as complete beginners using kits at home.
The key to standing out: don’t copy everyone else. Play around with styles, colors, or even little custom charms that say something about the person getting it. Sometimes, it’s the personal touch—like including a person’s birthstone or using their favorite color—that gets the most attention.
Here’s a simple path for turning those starter creations into something more:
- Give your first few pieces as gifts and ask for honest feedback. What did people love? Anything that felt off?
- Take a few clear photos of your work—natural light helps a ton—and set up a simple online shop or Instagram account.
- List your pieces with short, friendly descriptions. Talk about why you made them or how they could be gifted for special occasions.
- If something sells, don’t forget to ask for a review. Real reviews help future buyers trust you.
Check out these real stats to give you an idea of what’s happening in the DIY jewellery market right now:
| Platform | # of Jewellery Sellers (2024) | Avg. Monthly Sales |
|---|---|---|
| Etsy | 2,000,000+ | 5-50 pieces |
| Instagram Shops | 500,000+ | 3-20 pieces |
| Facebook Marketplace | 750,000+ | 2-15 pieces |
One last tip: Don’t be afraid to price your work in a way that covers your costs and gives you a reward for your time. Starting with jewellery making kits means your costs are lower, so you can test different price points as you find your style. Whether you keep it low-key with gifts for friends or go full-on with online sales, your hobby can turn into something way bigger than you’d expect.